|
Kitchen Construction - December 21 to January 1, 2003 |
|
|
|
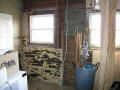
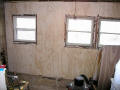
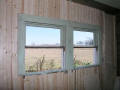
Rain Creek Farm Work on the kitchen wall resumes during the holidays. The green portion of this wall was the back of the cabinet over the kitchen counter. There was no interior wall behind the cabinet above or below the counter. Likewise there was no insulation. (12.21.02) |
|
|
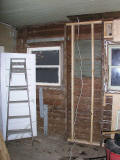
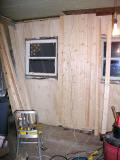
Rain Creek Farm Work continues from right to left. Removing the existing interior wall and adding wall studs on 16-inch centers. The original studs are on 40-inch centers. Note that two pieces of wood (blue) were added to back the exterior siding under the window. (12.21.02) |
|
|
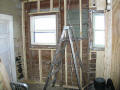
Rain Creek Farm Framing is complete with the exception of adding a double plate to the bottom to accommodate nailing of 8-foot material to this 8-foot, 4-inch wall. (12.28.02) |
|
|
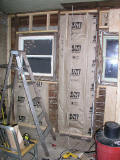
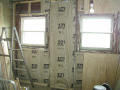
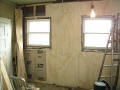
Rain Creek Farm Here comes the R-13 insulation. (12.28.02) |
|
|
Rain Creek Farm Another day and more insulation. (12.29.02) |
|
|
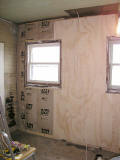
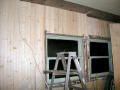
Rain Creek Farm Four by eight sheets of plywood are cut to fit around the windows. (12.29.02) |
|
|
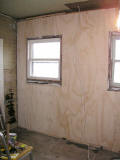
Rain Creek Farm Ready for the last sheet of plywood. (12.29.02) |
|
|
Rain Creek Farm And there it is!. The entire north wall has been covered with plywood. The electrical wire coming out of the ceiling is a temporary circuit for the refrigerator and microwave oven. (12.29.02) |
|
|
Rain Creek Farm A bookshelf counter will be installed under the single window at the left. Our Chambers stove will just fit between the windows with a vent hood and wall cabinet above. A vintage cast iron and white porcelain sink with drain boards will be centered under the double windows. (12.29.02) |
|
|
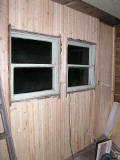
Rain Creek Farm Starting at the center double bead boards start going over the plywood. This will bring the wall out to the proper thickness. Six-inch baseboards will cover the bottom of the 8-foot pine boards. (12.29.02) |
|
|
Rain Creek Farm New cabinets will be built over the windows to match the original cabinets. (12.29.02) |
|
|
Rain Creek Farm Beaded boards are nailed into place with common ring-shank nails. (12.29.02) |
|
|
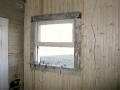
Rain Creek Farm Beaded board continues to go up. Below the window is an electrical outlet for the dishwasher. Just beyond the window is a electrical outlet for countertop appliances. (12.30.02) |
|
|
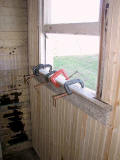
Rain Creek Farm The original window trim was saved for reinstallation. The bottom trim, under the sill, won't go on until we decide what kind of backsplash we want over the sink. The sill is redwood, the remaining trim is long-leaf pine that's so hard that most of the nails were easily bent trying to get through them. (01.01.03) |
|
|
Rain Creek Farm Using the old wood helps us keep as much of the house original as possible. (01.01.03) |
|
|
Rain Creek Farm A split in the redwood sill is repaired with wood glue and nailed into it's original location. (01.01.03) |
|
|
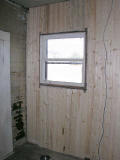
Rain Creek Farm This window is fully trimmed out. Of course the old wood will be scraped, sanded and painted. (01.01.03) |
|
|
|
|
November 02, 2006 Copyright 2003 David K. Stall | |